Easily Groom your Dog’s Ears, with these 6 Simple Steps
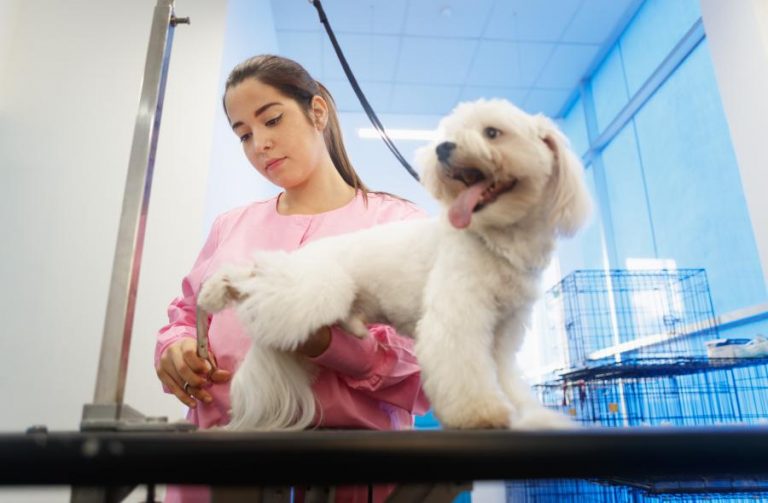
Grooming the ears of your dog is imperative if you want to maintain its health and hygiene, or else you could be paying a visit to the vet for yeast infection or mites If you allow the bacteria, yeast, and mite to grow in the ears of your dog, it could lead to a very painful infection that can end up in deafness. You must groom, clean and pluck the inner fur and cut along the outer fur on the ear flaps, regularly. But if you own a biter, fighter, or a hyper dog, don’t try to groom its ears all alone.
Easily Groom your Dog’s Ears, with these 6 Simple Steps:
- Step 1: Make the Necessary Preparations
- Step 2: Sprinkle plucking powder on the fur of your dog’s ear
- Step 3: Pluck the Hair in Small Groups
- Step 4: Repeat the Same Process for the other ear
- Step 5: Wipe the Area of the Ear which you cleared
- Step 6: Give a reward
You must remember that the ears are very sensitive and tender. Your dog may feel anxiety and tension when you touch his outer or inner ear. So you must take your time, be patient, and pat his belly to relax him.
Contents
Groom your Dog
Below, I have given a simple and comprehensive step by step guide that you can follow for the grooming of your dog’s ears.
● Step 1: Make the Necessary Preparations
You must keep all the sharp tools at a safe distance so that your dog cannot kick them and hurt itself. You must ask for the help of a friend or a partner to hold your dog in a proper position.
● Step 2: Sprinkle plucking powder on the fur of your dog’s ear
Plucking powder adds a lot of grip to the fur that you are trying to pluck. If the fur is very long you can pluck it with your fingers. You must be very careful while sprinkling the plucking powder and use a very small amount to help it stick to the hair instead of slipping inside the canal.
● Step 3: Pluck the Hair in Small Groups
You must pluck all the inner hair in small groups at a time, instead of plucking individual hair. This process should be fairly painless and comfortable for your pet.
● Step 4: Repeat the Same Process for the other ear
For the other ear, first, sprinkle a small quantity of plucking powder and then start removing the hair.
● Step 5: Wipe the Area of the Ear which you cleared
You must then wipe off the skin inside the ear to clean the area where the fur was just plucked, use wet cotton. Make sure to use tweezers.
● Step 6: Reward
This is the final step, so remember not to skip it. Your dog has been cooperative and deserves a reward, give your dog its favorite food or a toy as a reward.
How to Clean your Dog’s Ears
● Step 1: Use Wet Wipes or Pet Paper Towel to Clean the Ears
Be careful while wiping the ears of your pet and make sure that the towel or the paper does not slip inside the ear canal, it can cause injury.
● Step 2: Trim the Ear Tufts
Use a small pair of sharp scissors to trim the long patches of fur or smooth tufts. You must make sure that your hands are not trembling and there is enough light in the room. Never point the scissors towards the ear canal, keep it parallel.
● Step 3: Use Forceps or Tweezers to Complete the Process
For the remaining hair, you can use forceps or tweezers. Pluck a small amount of fur at a time.
● Step 4: Use a Veterinarian-approved Ear Cleaning Solutions
Squeeze the bottle of solution and let it sit inside for at least 30 seconds. Never use hydrogen peroxide for the cleaning of the inner ear. You must only stick to the veterinarian-approved cleaning solutions.
● Step 5: Massage
With a gentle hand, massage the ear canals of your dog while the solution is still inside it. Wait for your dog to shake his head to drain the liquid out of his ears.
● Step 6: Wipe Again.
Use some cotton balls to dry the remaining liquid. Remove all the hair or the debris if any is left.
How to Soothe an Itch in Your Dog’s Ears
● Step 1: Consult a veterinarian
If you notice that your dog is constantly feeling irritation and scratching in his ears, you must visit a veterinary clinic at once. Give your dog a 2 mg tablet of a common antihistamine, like diphenhydramine, for every kg of his body weight. You must remember that only 10% of dogs can benefit from this medicine in the case of the ear itch.
● Step 2: Never use tea tree oil.
Pet disinfectants, skin treatment solutions, and shampoos marketed across the world have a high ratio of tea tree oil added to them, which is toxic for the dog and can cause even death. Remember that your dog cannot tolerate more than one percent of tea tree oil if used inside his ears.
● Step 3: For Temporary Relief, Use an Anti-Inflammatory Medicine or Cream
Consult your veterinarian before using corticosteroids which are potent anti-inflammatories. They are excellent for temporary relief of itchiness. You must also ask your vet about using over-the-counter (OTC) creams that contain up to 1% hydrocortisone. This treatment can be very harmful and result in death if your dog.
● Step 4: Know Your Dog’s Allergies
If your dog shows the symptoms of allergy in the spring season, then you must try to keep him indoors. In some rare cases, pollen grains are responsible for ear infections. Your vet will recommend putting your dog or pup on a hypoallergenic diet as a trial to know if the allergies improve.
● Step 5: Treat the Biting Parasites
You must make sure that your dog is regularly treated by a professional vet against biting parasites such as fleas. You must keep your dog’s coat and skin neat and clean with regular bathing and blow-drying using a gentle moisturizing shampoo and conditioner such as an organic oatmeal shampoo. Unfortunately, prescription medications are usually needed to give complete relief from an ear itch, so you must consult an expert vet.
What to do if Your Dog’s Ears get Torn
● Step 1: Use a bandage to stop the bleeding
If your dog has been involved in a fight or its ears got torn in thorny bushes, tie a bandage around its head to stop the bleeding. There is a vein at the edge of the ear flaps or the pinna. If this marginal vein gets cut by a bite or a sharp thing, there will be heavy bleeding.
● Step 2: Clean and Disinfect the Wounded Area
Take one tablespoon of salt and mix it in 2 cups of clean tap water. Take a piece of cotton and soak it in the saline solution. Clean the wounded area. If your dog allows you, rub the areas around the wound to remove any debris.
● Step 3: Cover the Wound
After controlling the bleeding, you apply a new, clean piece of gauze to the wounded skin. If you are using adhesive bandage pads, you must choose to layer them over the wounded area, leaving one-third of the previous bandage exposed with every successive layering.
● Step 4: Make Sure the Bandage is Comfortable
You must make sure that the bandage is not too tight that it compresses the windpipe of your dog otherwise it will become difficult to breathe. You must make sure that the bandage doesn’t cover the eyes.
● Step 5: Use a Clean Sock to Cover the Wound if you don’t have a Proper Bandage
If you don’t have a first aid box, cut a hole at the toe end of your sock or stocking. Carefully pull your sock/stocking over your dog’s head, with his face through the sock’s hole. Make sure that your dog can breathe, see, and smell, comfortably and that it does not cover his head until it is past his eyes.
Final remarks
I hope you find this blog post helpful the next time you groom your dog, follow through with these 6 steps and you and your dog will be fine. Remember, your dog needs attention, effort, and time.

